Episode 7: Drawing a Background and a Player


Last time, we figured out how to draw single pixels on the screen. Armed with this knowledge, we should be able to fill the whole screen with a background color and draw a little figure representing the player.
In place of our setpixel calls, here's nice little double loop which calls the putpixel procedure to color every pixel of the 320x200 screen blue:
mov dl, 1           ; Color 1 = blue
mov cx, 200
nextRow:
  mov ax, 200
  sub ax, cx        ; AX is now the row number (y)
  push cx
  mov cx, 320
  nextPixel:
    mov bx, 320
    sub bx, cx      ; BX is now the column number (x)
    call putpixel
  loop nextPixel
  pop cx
loop nextRow
nextRow is run 200 times, once for each row. The inner loop, nextPixel, is run 320 times (once for each column) each time through nextRow. Notice that since we have 2 loops but only 1 counting variable (CX), we have to push CX before using it for column counts inside nextPixel, then pop it after the row has been filled. Let's see what we get:
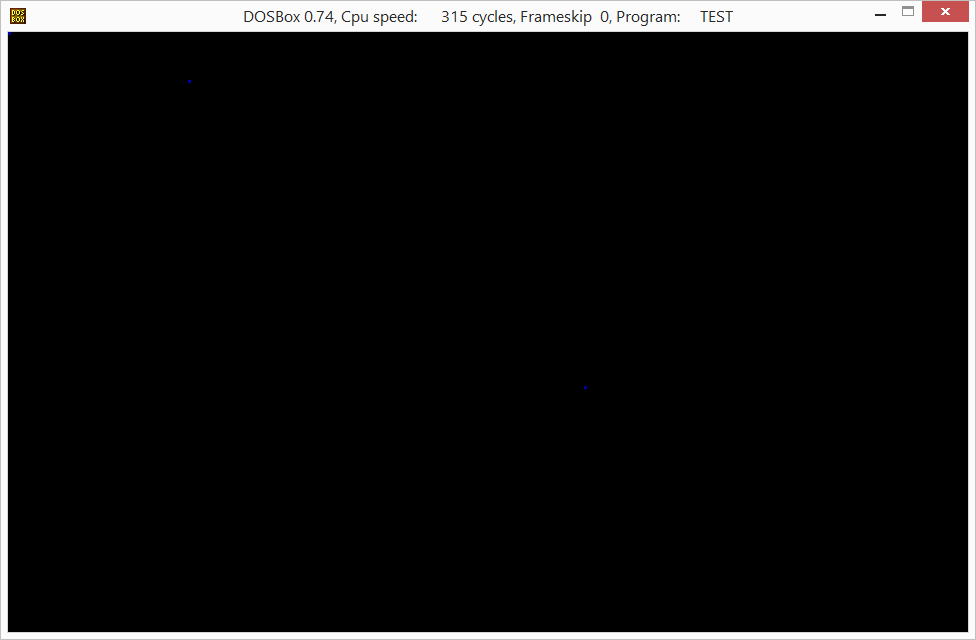
Complete and utter failure. Looks like 2 or 3 pixels actually got filled in. So what happened?putpixel expects the X and Y coordinates to be in BX and AX and the color to be in DL, that's all good, but it also messes with the contents of these registers. Look back through putpixel: It makes no effort to preserve the values of AX, CX, and DX. That means the second time we call the procedure, when we still expect AX to be the current row number, it's not. Nor is the color in DL still 1. So we must take into account that these 3 registers are going to be "clobbered" by pushing them onto the stack before the procedure call, then pulling them off again (in reverse order, of course):
mov dl, 1           ; Color 1 = blue
mov cx, 200
nextRow:
  mov ax, 200
  sub ax, cx        ; AX is now the row number (y)
  push cx
  mov cx, 320
  nextPixel:
    mov bx, 320
    sub bx, cx      ; BX is now the column number (x)
    push ax         ; Save the states of AX, CX, DX
    push cx
    push dx
    call putpixel
    pop dx          ; Restore our pushed registers
    pop cx
    pop ax
  loop nextPixel
  pop cx
loop nextRow
Again, assembly is a totally different way of thinking, especially if all you've ever known is the high-level-language world!
Now, success:
But did you see how long that took? If you've got DOSBox configured to properly emulate a PCjr, it takes almost 10 seconds to fill the screen! It's a slow machine, but besides that, we're doing it in a really inefficient way. First, for each pair of pixels, we're pulling the same byte, writing it, and putting it back, instead of writing both pixels at once. Additionally, if we know we're filling full lines, there's no need to do the complex calculation for bank number and row number for every pixel on the line - we can calculate it once, for the row, then fill the entire row just by incrementing our pointer. Even further, if we know we're filling the full screen, there's not even a need to figure out the bank number of each row - just fill all 4 banks. And the ultimate optimization: Why even fill the four banks individually? The video card doesn't care about the 192 bytes between each bank so why not just fill the whole 32KB framebuffer starting at 0xb8000?
So let's do another, simpler function taking all this into account:
; Fills the framebuffer with color index DL
cls:
  ; Copy the low nibble of DL to the high nibble
  and dl, 0x0f   ; Clear the high nibble
  mov dh, dl     ; Make a copy in DH
  mov cl, 4
  shl dh, cl     ; Shift DH left 4 bits (make the low nibble the high nibble)

  or dl, dh      ; Combine the nibbles
  mov dh, dl     ; Now DX is the 4-bit color repeated 4 times

  mov ax, 0xb800
  mov es, ax     ; Set ES to point to the framebuffer
  xor di, di     ; Set DI to 0 (STOSW will copy to ES:DI)
  mov ax, dx
  mov cx, 0x4000 ; Fill 32KB (0x4000 16-bit words)
  rep stosw      ;

  ret
Now we have a lean, mean, screen-filling machine! First we will copy the color, which is the low 4 bits of DL, into the high 4 bits, then copy all of DL into DH. Now DX represents 4 pixels of color data. Next, meet two new instructions: rep and stosw. REP means "repeat" and STOSW means "store string - word", and this little pair packs quite a punch: It copies the word (2 bytes) in AX to memory location ES:DI and increments DI by two, and repeats those two steps CX times. To set this up, we just set ES to point to the framebuffer, set DI to 0, load our four pixels from DX to AX, and load CX with the count of words we want to write - 32KB is 32768 which is 0x8000 bytes which is 0x4000 words. Then we fire off rep stosw and wait...
...but we don't have to wait too long: The screen is filled in a couple milliseconds, tens of milliseconds at most. Much better! As we'll see, stosb and stosw and their friends movsb and movsw will become very important tools when moving around blocks of data.
Let's go big. By the end of this lesson I want to be able to draw a little image of a player on the screen and move it around with the arrow keys.
First we need an X and Y position for the player, in the .data section. A 2-byte word for each - we can't use bytes because we need our X position to go to 320, and a byte only goes to 255. Let's start the player in the middle of the screen:
player_x: dw 160
player_y: dw 100
Now let's draw something simple to represent our player. How about a green 8x8 square?
We'll build this function up piece-by-piece. First we know that we're going to loop over 8 rows starting at the player's Y position:
draw_player:
  mov cx, 8
  .drawRow:
    mov ax, 8
    sub ax, cx
    add ax, [player_y]      ; AX = row (y)
    ; do something with the row in AX
  loop .drawRow
  ret
For each row, we want to loop over 8 columns starting with the player's X position:
draw_player:
  mov cx, 8
  .drawRow:
    mov ax, 8
    sub ax, cx
    add ax, [player_y]      ; AX = row (y)
    push cx
    mov cx, 8
    .drawPixel:
      mov bx, 8
      sub bx, cx
      add bx, [player_x]    ; BX = col (x)
      ; draw the pixel in (BX, AX)
      loop .drawPixel
    pop cx
    loop .drawRow
  ret
Now we have code that loops over each X,Y pair (stored in BX, AX) in the 8x8 square starting at the player's position. All we have to do is set the pixel color in DL and call putpixel:
draw_player:
  mov cx, 8
  .drawRow:
    mov ax, 8
    sub ax, cx
    add ax, [player_y]      ; AX = row (y)
    push cx
    mov cx, 8
    .drawPixel:
      mov bx, 8
      sub bx, cx
      add bx, [player_x]    ; BX = col (x)
      mov dl, 10
      push ax
      push cx
      call putpixel         ; (BX, AX) = (x,y), DL = color
      pop cx
      pop ax
      loop .drawPixel
    pop cx
    loop .drawRow
  ret
Of course we make sure to push AX and CX first as they'll be clobbered by putpixel. And whatever we push, we have to pop in reverse order.
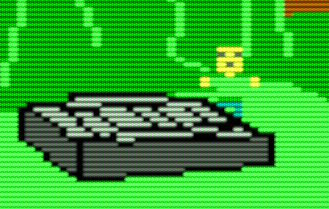
Hold on to your hat:

And that's exactly what we wanted!
Now it is time to move that guy around. All we need to do is look for an arrow key, move player_x or player_y in response and redraw the player. We already know how to wait for a key, because we do it in our waitForAnyKey macro -- but INT 21H fn 8 only reads keys that produce printable ASCII characters, and that doesn't include the arrow keys. For those, we need to break out INT 16H: Keyboard Services. INT21H fn 0 returns key scan codes in AH so we can catch every key on the keyboard. A simple Google search will reveal the scancodes for the arrow keys, and we can write a simple procedure to test for them one-by-one:
process_key:
  cmp ah, 1
  jne .testUp
  mov byte [is_running], 0
  jmp .done
.testUp:
  cmp ah, 0x48
  jne .testDown
  dec word [player_y]
  jmp .done
.testDown:
  cmp ah, 0x50
  jne .testLeft
  inc word [player_y]
  jmp .done
.testLeft:
  cmp ah, 0x4b
  jne .testRight
  dec word [player_x]
  jmp .done
.testRight:
  cmp ah, 0x4d
  jne .done
  inc word [player_x]
.done:
  ret
It's convoluted, but necessary because assembly doesn't have IF or CASE statements or any other method of control flow besides jumps based on the results of comparisons. If we intercept an arrow key, we update player_x or player_y accordingly (by incrementing or decrementing them). I've also added a test for the Escape key which sets a variable, is_running (normally nonzero) to zero. Our main control flow can now be a loop where we draw the background and the player, wait for a key, process it, and jump back to the top of the loop unless is_running has been zeroed.
Let's look at the result:
Ugh. Gross. Even with our fast clear-screen procedure there's still a noticeable lag in repainting the whole screen. Clearly we're going to have to be more conservative, only repainting the areas that have changed and leaving the rest alone. Maybe we can even store our background in a buffer and copy changed areas from it to video memory, in case we want a more complicated background than a solid color. The operation that copies a rectangle of pixels from a back buffer to video memory is called a bit-block transfer, a.k.a. "bit blit", and with our procedure to paint an 8x8 rectangle on the screen as a starting point we're halfway there.
Completed source code for this episode is at:
https://github.com/josh2112/pcjr-asm-game/tree/episode-6