Episode 10: Redemption


When I last blogged on this project, over a year ago, I had all but given up. I was stuck on the fact that even after hours of optimization, my method of drawing an 8x8 block of pixels (by plotting each pixel individually) was just too slow for a workable game on the PCjr. I realized that copying whole rows, instead of individual pixels each needing their own function call and set of calculations, would be way more efficient, but my laziness and loss of motivation combined with family and work concerns meant that my game was put aside for months.
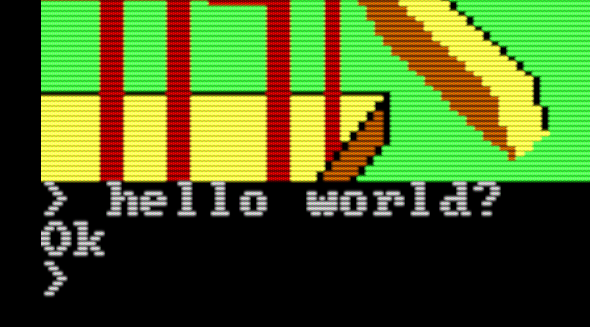
Now I'm happy to report that progress – lots of it – has been made:
You are seeing fast animation of an image with no flickering and no tearing, made possible by the use of two common computer graphics techniques:
- Bit-block transfer ("bit blit")
- Compositing
First we'll greatly increase the speed of our draw_rect. These improvements will naturally lead us to bit-blitting and rendering images which we'll address in the next episode.
Faster draw_rect
Our existing draw_rect function calculates the (X,Y) location of each pixel in an 8x8 rectangle and uses our putpixel function to color that pixel. putpixel converts the (X,Y) location to a memory address and writes the color to that address. That's a lot of calculation! Instead of calculating the address separately for each (X,Y), why not take it a row at a time – calculate the address for the first pixel in a row, then color the whole row at once by incrementing the address until we hit the end of the row?
But first we must take a diversion and discuss a better way to get parameters into a function.
Using The Stack
Currently we pass parameters to a function by sticking them in registers. putpixel, for example, expects the (X,Y) location in AX and BX and the color in DL. If the function needs to use those registers, it will have to push them out of the way and pop them back again when needed. Inside a loop this may be very inefficient or impossible. Besides, what if we have more arguments than registers? We need to learn to make use of the stack.
The stack is an area of memory set aside for temporary storage of data. Visualize it like a real-life stack of blocks where each block is a piece of data: You can stack blocks one at a time, and you remove them in the opposite order in which you stacked them. The 8088 stack grows downward (it should really be called a stalactite!), and the current item on the stack is pointed to by the special register SP ("stack pointer").
We've already been using the stack when we issue push and pop instructions. When you push an item onto the stack, you are decrementing SP by 2, then moving the item into the new address pointed to by SP. When you pop an item, you're moving the current stack item into the register you specify, then incrementing SP by 2. The call and ret instructions make use of the stack as well; call pushes the current instruction pointer onto the stack (so the CPU knows where to return to when the function is returned from) before jumping to the specified instruction and ret pops the pushed instruction pointer off the stack and jumps back to it.
Since we have the address of the stack in SP, we can access stack data without popping it by reading memory locations above SP. For example we can push 3 words onto the stack, then access them without popping via [SP+2], [SP+4] and [SP+6]. We can take advantage of this to pass an arbitrary amount of data to a function via the stack and access it from inside the function without popping it, freeing up our registers for other tasks!
Image we have the following (pseudo-C) function to add two numbers:add_nums( num1, num2 )
Let's pass those two variables on the stack. First we push them in reverse order, then call the function. Remember that the call instruction will push the current instruction pointer onto the stack before jumping. So inside the stack, we have access to the following variables:
- instruction pointer at [SP]
- num1 at [SP+2]
- num2 at [SP+4]
- etc.
Now these address only hold true as long as SP is not modified. But you'll probably be pushing and popping all over the place inside your function. To avoid this problem we can save the current SP in another special register, BP. BP is called the "base pointer" because it serves as a base from which to access passed-in arguments. Inside the function, first push BP (in case the caller was using it), then copy the value of SP into BP for our local use. We can now access arguments as offsets from BP! (There is one niggle here; since we modified the stack further by pushing BP, our arguments now start at [BP+4] instead of [BP+2]).
Remember that each push should have a corresponding pop. We obviously need to pop the value of BP immediately before returning, but we also have all the pushes for our arguments. Do we need to execute 2 pops after the call returns? We could, but since we don't need the values anymore we could also just move the stack pointer to where it was before the pushes with add sp, 4. But the 8088 instruction set provides us with a convenient form of the ret instruction that does that for us, so we could just say ret 4.
So let's put it all together and call our pretend add_nums() function:
push [num2]    ; Remember to push arguments in reverse order!
push [num1]
call add_nums  ; Result will be in AX
... more code...
ret

add_nums:        ; add_nums( num1, num2 ) => ax
  ; Stack setup
  push bp         ; Save caller's BP
  mov bp, sp      ; Make BP point to the stack
  ; Function code
  mov ax, [bp+4]  ; Put num1 in AX
  add [bp+6]      ; Add num2 to AX
  ; Stack teardown
  pop bp          ; Restore value of BP from caller
  ret 4           ; Return, destroying the 4 bytes (2 two-byte words) we passed on the stack
It may seem like a lot of unnecessary code, but instead of having to remember which arguments are in which arbitrary registers we just remember the argument sequence. Plus this sets us up for being able to use local variables, to be addressed in a future episode.
Now Back To draw_rect
To color a row of 8 pixels, instead of calculating 8 (X,Y) pairs and calling putpixel 8 times, we can convert the (X,Y) of the leftmost pixel in the row to an address, then copy the color and increment the address 8 times. Pseudocode (note our use of the stack to pass in 5 arguments):
; draw_rect( x, y, w, h, color )
; Writes a color to a block of pixels of the given size at the given location.
; NOTE: X and W must be even!
; Args:
;   bp+4 = x, bp+6 = y,
;   bp+8 = w, bp+10 = h,
;   bp+12 = color
draw_rect:
  push bp     ; Set up BP for accessing arguments
  mov bp, sp

  mov cx, [bp+10]  ; Run .copyLine for each row

  .copyLine:
    ; row = y + h
    ; bank_num = row / 4  (there are 4 scanline banks)
    ; row_within_bank = remainder of row / 4
    ; bank_offset = bank_num * 0x2000  (each bank is 8192 bytes, or 0x2000)
    ; address = bank_offset + (row_within_bank * 320 + x) / 2  (divide by 2 because each byte addresses 2 pixels)

    ; Run .copyByte for each byte in row width (which is half the number of pixels)
    push cx
    mov cx, [bp+8]
    shr cx, 1

    .copyByte:
      ; Copy color to [es:di], increment di
      loop .copyByte

    pop cx
    loop .copyLine

  pop bp   ; Restore BP
  ret 10   ; Remove our 5 arguments from the stack
.copyLine/.copyByte is an adaptation of our putpixel code; it uses the same method to calculate the pixel address from the (X,Y) location, then we fill [width] pixels instead of just one. See the full code for draw_rect at the GitHub link at the end of this episode.
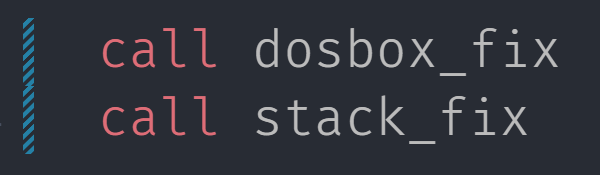
That's it! Aside from the rewrite of draw_rect (and moving it from render.asm to std/320x200x16.asm), the only differences are in test.asm where we added player_w and player_h variables (player's width and height) and pushing our draw_rect arguments onto the stack before calling the function.
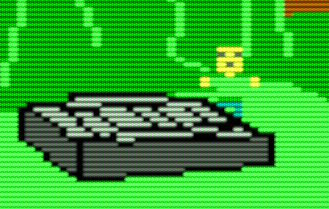
Let's try it:
It's fast, and there's no tearing or flickering -- looking good!
See the full code for this episode in the project's GitHub.